How to deploy a web with Amplify Hosting
I will explain to you all you need to know to deploy a web using AWS Amplify. I did it to deploy the first version of my blog, so I will use it as an example.
Updated April 2023. I have updated this article to add more information about AWS Amplify.
1. Introduction
This is a practical use case where I will explain step-by-step how I deployed my blog using Amplify Hosting. I will use the AWS Console to do it.
The source code of my blog (web) is available here
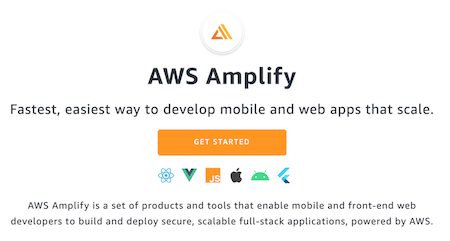
2. AWS Amplify
AWS Amplify is a set of purpose-built tools and features that enables frontend web and mobile developers to quickly and easily build full-stack applications on AWS.
Amplify provides two services: Amplify Hosting and Amplify Studio.
- Amplify Hosting provides a git-based workflow for hosting full-stack serverless web apps with continuous deployment.
- Amplify Studio is a visual development environment that simplifies the creation of scalable, full-stack web and mobile apps. Use Studio to build your frontend UI with a set of ready-to-use UI components, create an app backend, and then connect the two together.
AWS Amplify is the fastest and easiest way to develop and deploy reliable and scalable mobile and web applications on AWS.
3. How to deploy a web with Amplify
We need to have our code ready to be deployed in a supported repository.
- Supported repositories: GitHub, Bitbucket, GitLab and AWS CodeCommit.
- Another option is to deploy manually with drag and drop, Amazon S3 or any URL.
In AWS Console, enter to AWS Amplify service and choose Amplify Hosting
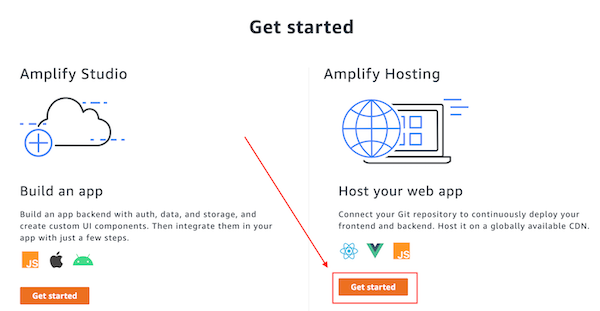
a) If you don’t have an Amplify app, this screen appears and you have to click on Get Started
and then choose Amplify Hosting
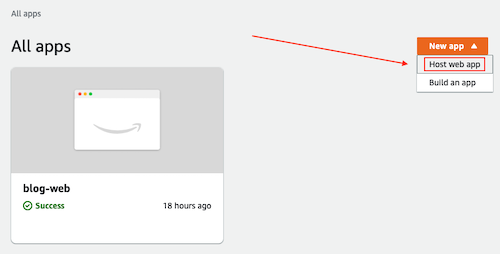
b) If you already have an Amplify resource click on New app and Host web app
Configure Amplify Hosting:
The first step to setting up Amplify Hosting is to connect your repository. In my case, I chose GitHub 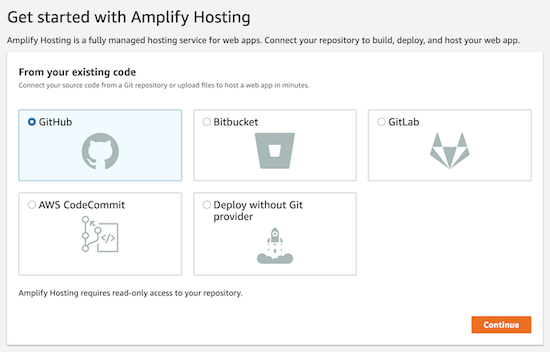
Add repository branch: choose your repository and your branch 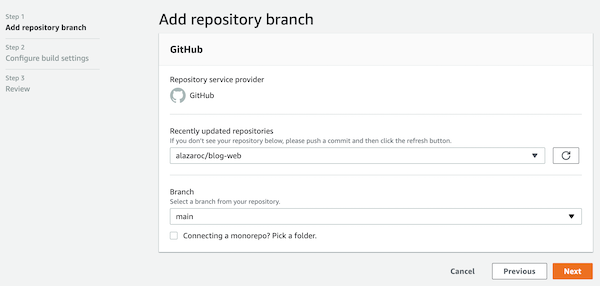
Configure build settings: Advanced settings are optional and allow you to reference your build image, add environment variables, and override default installed packages. 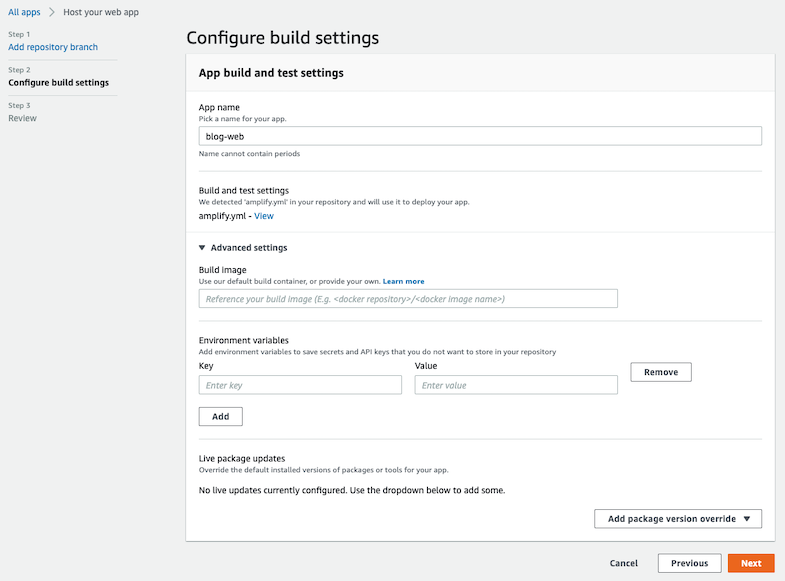
Review the configuration and click Save and deploy 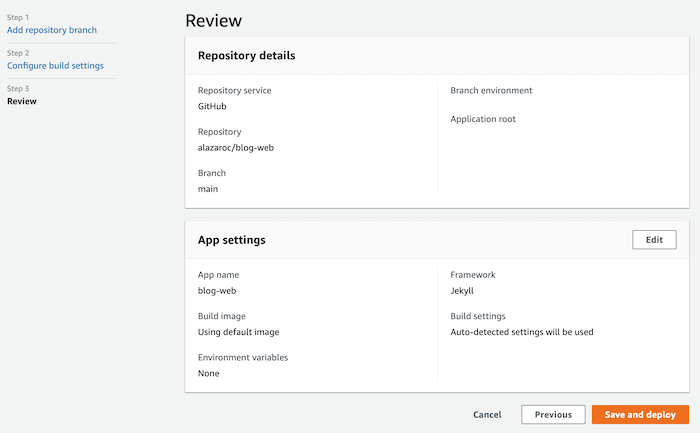
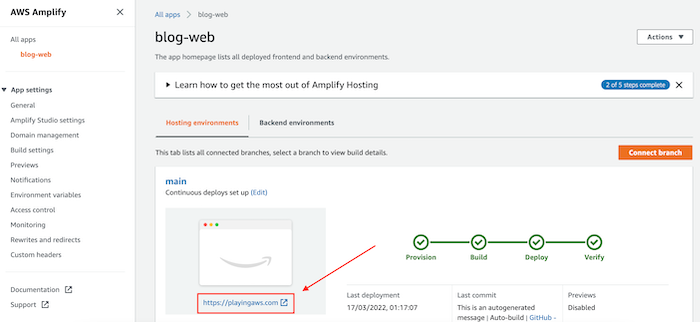
Now Amplify must be provisioned, built, deployed and verified 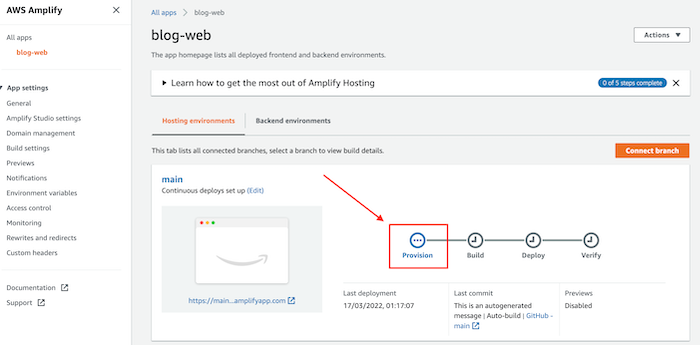
At this moment an email notification will be sent to your email (at least in the GitHub case) 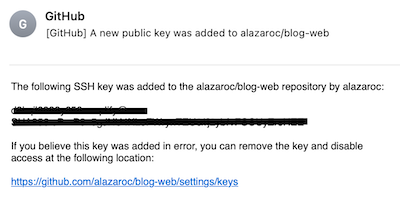
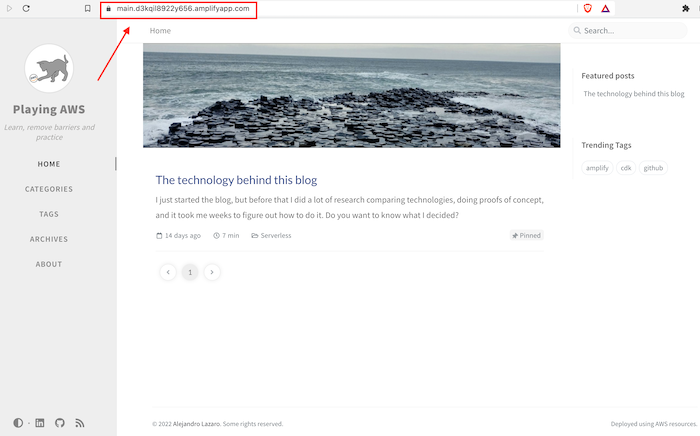
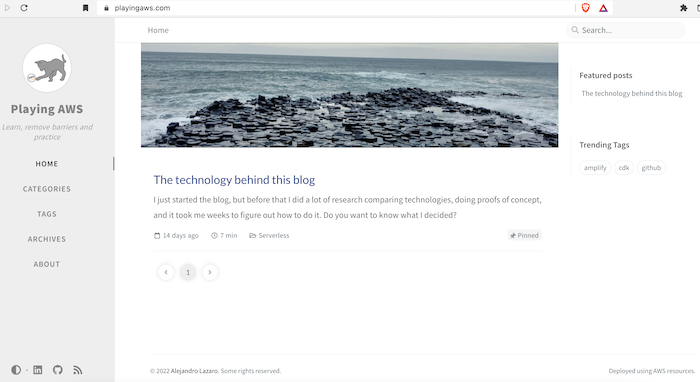
When finished, you will be able to access the new URL generated by Amplify 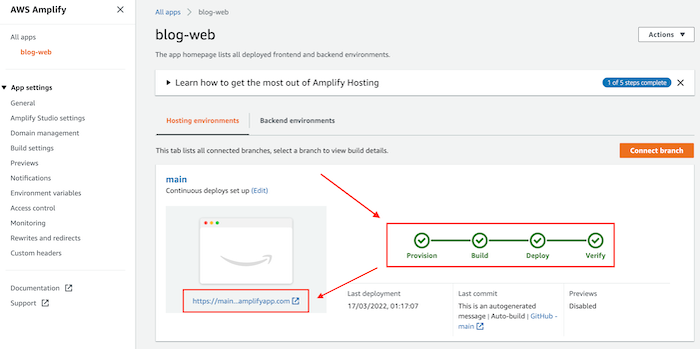
4. Additional configuration
In the following lines, we will review how to apply additional configuration to add more value to our website.
4.1. How to associate my web with my domain name
We can also set up our Domain Name to our deployed website with Amplify Hosting easily.
To register the domain name I used Amazon Route53.
Use Route53 is not the cheapest option (e.g. I paid $12 to register the new domain with Route53 instead of $1 the first year with GoDaddy), but it’s worth it (to me)
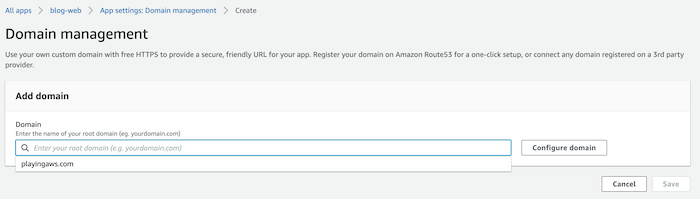
In the side menu, click Domain management, and then click Add domain.
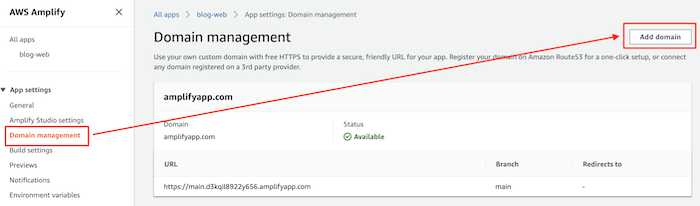
Choose your Domain and click on Save. As I register my domain with Route53, it appears in the text field when I click on it.
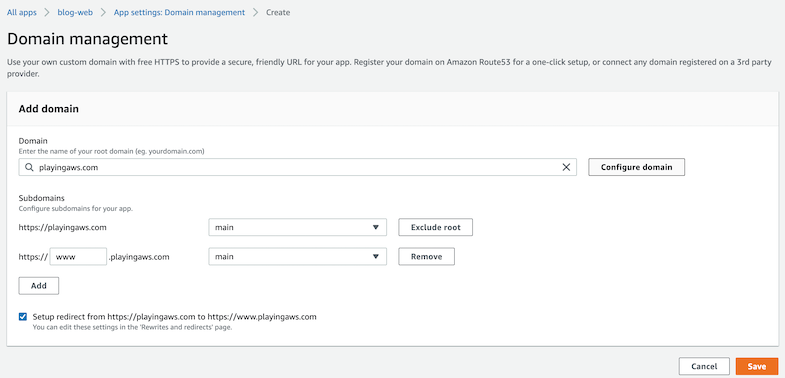
Now you can choose the branch, the subdomains and check for automatic redirect from HTTP to HTTPS, and click Save.
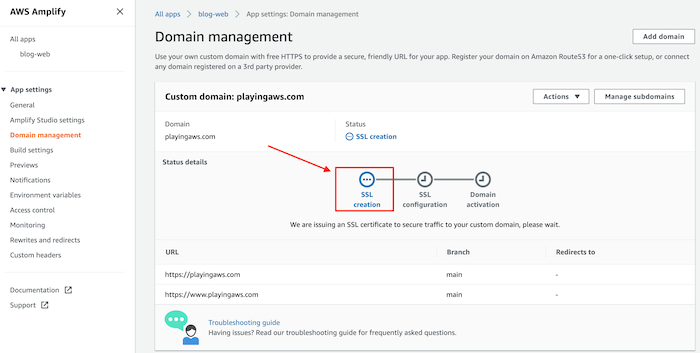
It may take several minutes to complete. First, you need to create the SSL certificate, then configure the SSL and finally activate it.
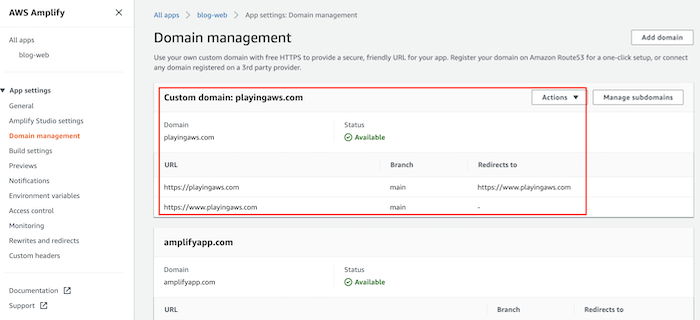
If we access the main page we can see that the URL has changed.
We can now access it with our domain name:
That’s it, quick and easy!
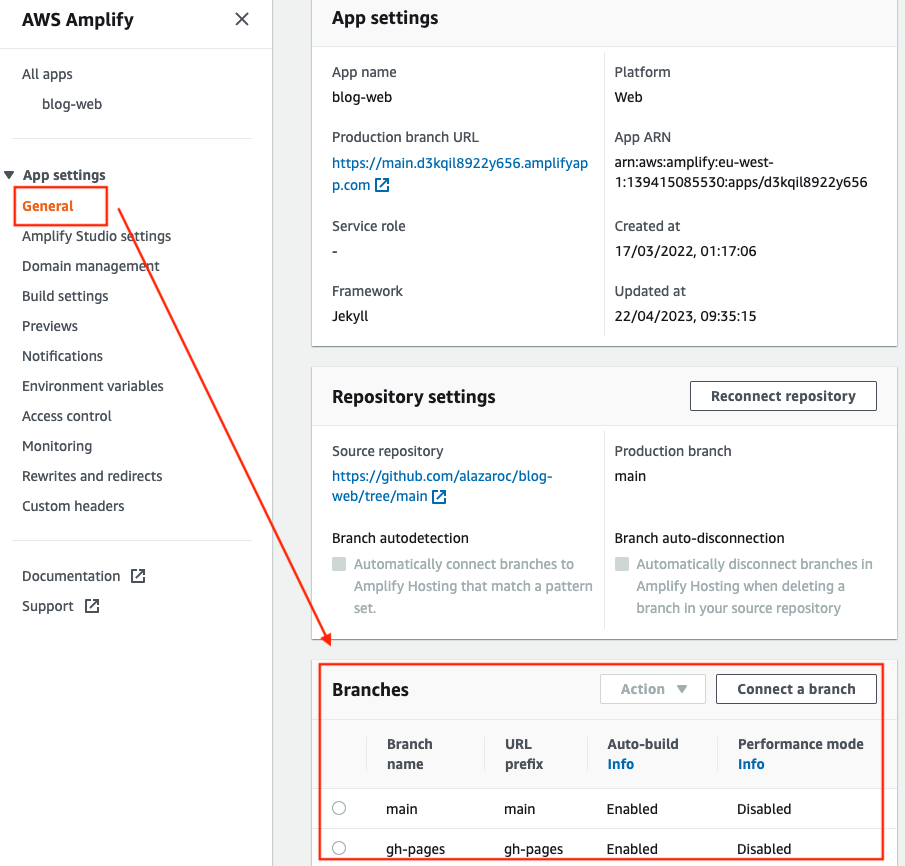
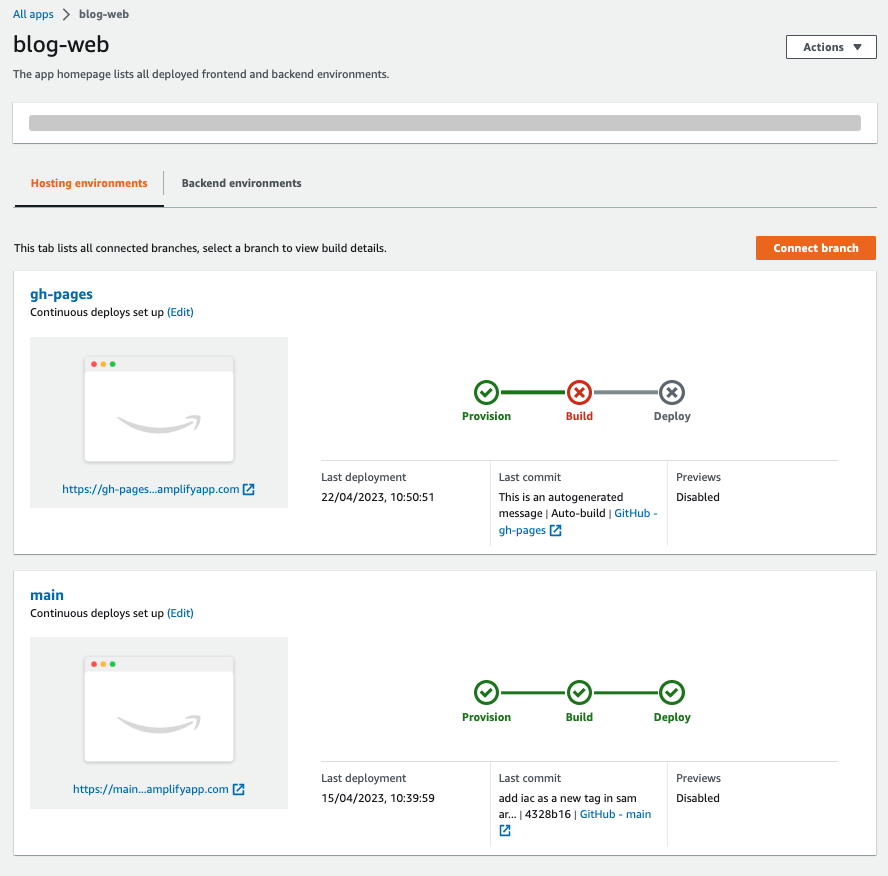
4.2. How to deploy different versions of the application
Configuring AWS Amplify Hosting to deploy several versions of the website is very easy, you just need different branches in the repository and configure them in the service as follows:
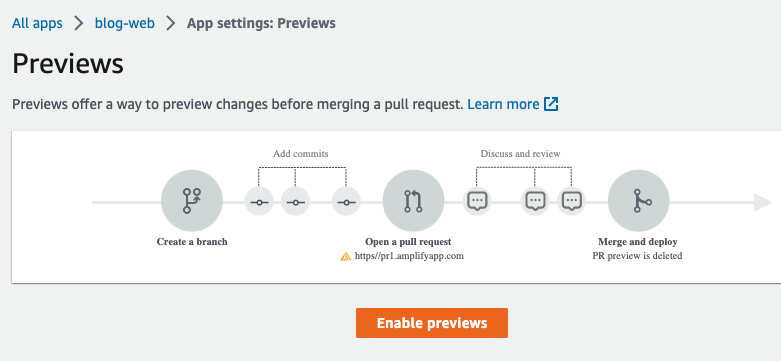
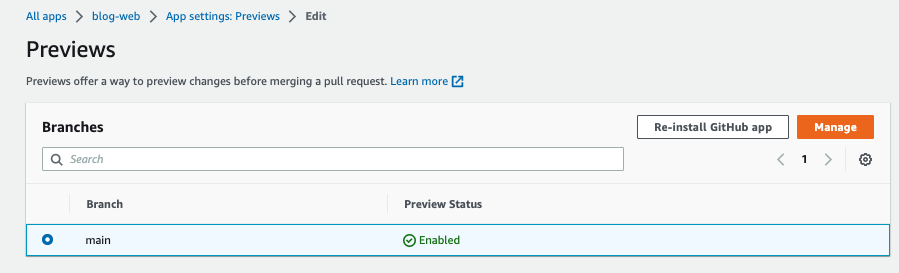
4.3. How to preview changes before applying them to production
Using the preview feature you can preview changes before merging a pull request.
To do that you have to:
- Create a new branch
- Enable
previewsand associate with your branch - Open a pull request –> A new version of the application will be deployed
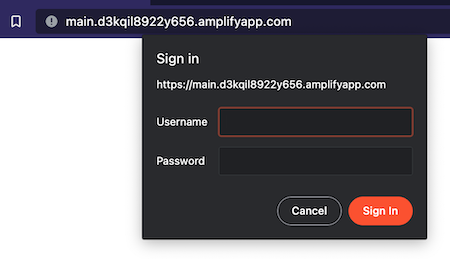
4.4. How to protect any environment
If you want to protect any environment to not be accessible by everyone, you can use the feature of Access Control. With this option, you can create a simple user/password to restrict access to your web:
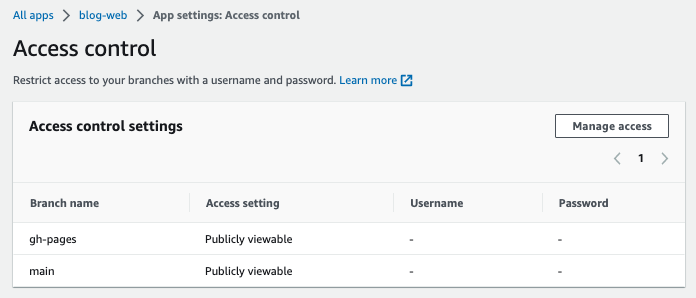
There are only 2 options for the option Access settings:
- Publicly available
- Restricted - password required
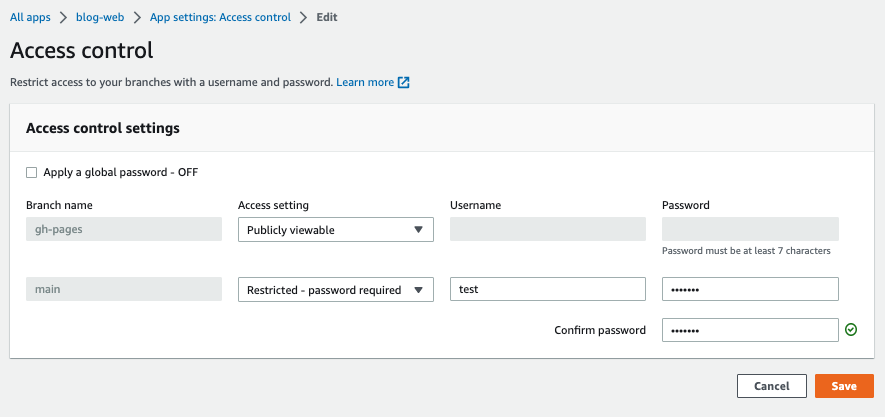
When you try to access now to the web you have to log in to view the content:
Example of use cases: staging environments, private demos, etc.
5. Conclusion
In this article, we have seen how AWS Amplify Hosting can be used to deploy a web application quickly and with very little operational overhead. It provides an easy way to connect your frontend with AWS services while taking care of common concerns such as builds, deployments, HTTPS, and hosting.
Amplify Hosting is especially useful for frontend-focused projects where speed and simplicity are more important than fine-grained infrastructure control. For many use cases, it removes the need to manually manage services like S3, CloudFront, or CI/CD pipelines.
From a practical point of view, this solution works very well for static websites, single-page applications, and early-stage projects where you want to focus on development rather than infrastructure. As your requirements grow, you can always move to more customized setups if needed.
Amplify Hosting is not the right tool for every scenario, but when it fits, it can significantly simplify how you deploy and operate web applications on AWS.